Replacing the Staple Cartridge in the Saddle Stitcher Unit (Booklet Finisher-N1)
When the saddle stitcher unit of the Booklet Finisher-N1 is almost out of staples and the staple cartridge in the saddle stitcher unit must be replaced, a screen prompting you to replace the staple cartridge appears on the touch panel display. Follow the procedure described below to replace the staple cartridge.
|
IMPORTANT
|
|
Take care when handling the optional equipment that is attached to the machine. When an optional unit's cover is opened to replace a staple cartridge, discard the punch waste/trim waste/staple waste, or clear paper or staple jams, prints may still be output if other optional units are operating normally, and are not involved in the paper or staple jam removal procedure.
If necessary, remove all of the output paper in the Booklet Tray before replacing the staple cartridge in the saddle stitcher unit.
|
|
NOTE
|
|
This procedure is necessary only if the Booklet Finisher-N1 is attached (the Booklet Finisher-N1 is an optional product).
When replacing the staple cartridges, replace both the front and back staple cartridges.
We recommend that you order staple cartridges from your local authorized Canon dealer before your stock runs out.
Use only staple cartridges intended for use with this machine.
 |
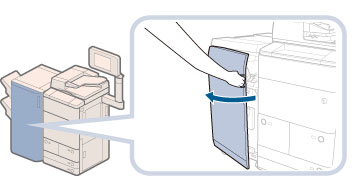
1.
Open the front cover of the finisher.
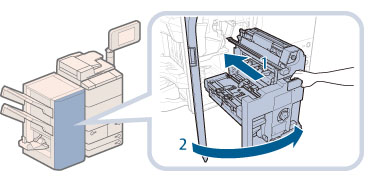
2.
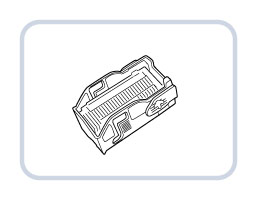
Pull out the staple case in the saddle stitcher unit (F-C5).
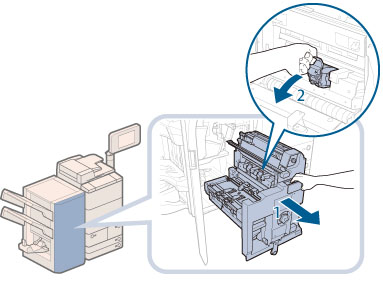
3.
Open the staple case cover by pressing the light blue area.
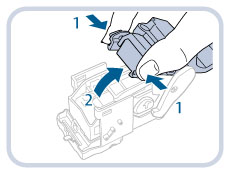
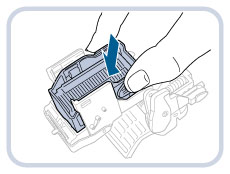
4.
Lift and pull out the empty staple cartridge.
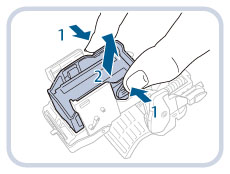 |
1.Squeeze the arrow indicated in step 3 (and its twin on the opposite side) to release the empty staple cartridge.
|
2.Lift and pull out the empty staple cartridge. |
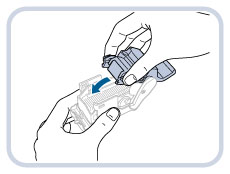
5.
Insert the new staple cartridge until it clicks into place.
6.
Close the staple case cover.
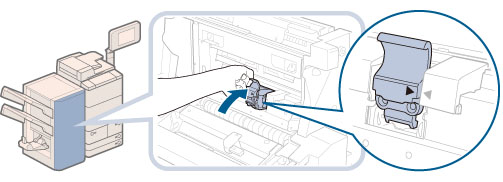
7.
Return the staple case to its original position in the saddle stitcher unit.
When returning the staple case, always make sure to the staple case is inserted until the arrows are aligned as shown in the diagram.
|
IMPORTANT
|
|
Follow steps 2 to 7 to replace the other staple cartridge in the saddle stitcher unit.
|
8.
Gently push the saddle stitcher unit (F-C5) back into the machine, and close the front cover.
 |
1.Gently push the saddle stitcher unit (F-C5) back into the machine.Always make sure to push the saddle stitcher unit in as far as it can go.
|
2.Close the front cover of the finisher. |
 CAUTION CAUTION |
|
When pushing the saddle stitcher unit back into its original position, be careful not to get your fingers caught, as this may result in personal injury.
When closing the front cover of the finisher, be careful not to get your fingers caught, as this may result in personal injury.
|