Specifying Send/Fax Security Settings
When entering a fax destination manually, there is a potential for the information to be leaked if the fax is mistakenly sent to the wrong destination.
Also, there is a possibility that data may be intercepted during the sending process by external users with ill intent.
By performing the applicable security settings on your imageRUNNER ADVANCE, you can help minimize the risk of information leakage when sending data.
This section describes procedures for the settings below.
The screens may differ, depending on the model of the machine and on attached optional products.
Setting the Address Book PIN
You can set a PIN for the Address Book, which is used when sending faxes and scanning. By setting a PIN, you can restrict the registering, editing, adding, and erasing of destinations. You can enter up to seven digits for the Address Book PIN.
Limiting New Destinations
This mode restricts sending to registered destinations only. Setting this mode in combination with the Address Book PIN enables you to strengthen the security for sending. Sending is only allowed in the following cases when this mode is set:
If you specify a destination stored in the Address Book
If you specify a destination via an LDAP Server
If you specify a destination by pressing a one-touch button
If you recall a destination stored in [Favorite Settings]
If you select [Send to Myself]
You can turn the limits On or Off for each send function (Fax, E-Mail, I-Fax, File Server).
You cannot enter new destinations for a restricted function.
Managing Address Book Access Numbers
This mode enables you to assign access numbers to each destination so that when you enter an access number, only the corresponding destination is displayed. By managing the access numbers and combining this mode with Limit New Destinations, you can limit the destinations available to each user.
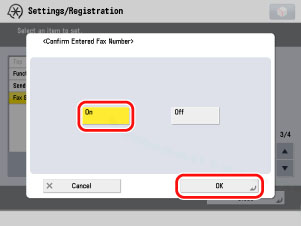
Confirming Entered Fax Numbers
This mode requires you to enter a fax number and confirm the number (enter the number a second time) to prevent misdialing.
Prohibiting Sending from the Fax Driver
This mode enables you to set the machine to prohibit sending from the fax driver.
By combining this mode with the management functions of the machine, you can help prevent unauthorized sending.
Setting the MAC Address Filter
The MAC Address Filter identifies the sender and regulates transmission.
A MAC Address is set for the machine receiving communications. A MAC Address is a unique network interface ID number for computers and network machines.
Access is restricted to machines with an authorized MAC address. A MAC address does not change even if the IP address is changed, enabling you to securely transmit data.
Specifying the TX Destination Domain
This mode enables you to restrict the domains where e-mails can be sent.
If you restrict the domains for sending, you can send documents only to destinations that belong to the specified domains.
In turn, this helps prevent information leakage.
Encrypting Data
You can set a password for opening a PDF file or encrypt the PDF file itself for sending. If you set a password for a PDF file, only recipients who enter the correct password can open, edit, or print the file. Also, you can grant editing/operating privileges according to the sensitivity of the information (optional kit required).
|
Required Condition
|
|
You are logged in as the administrator.
|
Setting the Address Book PIN
You can operate this procedure using the touch panel display or the Remote UI.
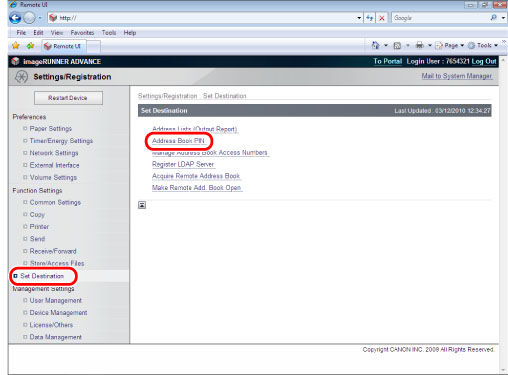
Using Remote UI
1.
Access the Remote UI → click [Settings/Registration] → [Set Destination] → [Address Book PIN].
2.
Select [Set Address Book PIN] → enter up to seven digits for <Address Book PIN> and <Confirm>.
|
NOTE
|
|
If you do not enter a PIN, you cannot display the Address Book from the Remote UI.
You can display or use the Address Book on the machine but cannot edit it.
|
Using the Touch Panel Display
You can also specify the settings from the control panel of the machine.
1.
Press  (Settings/Registration) → [Set Destination] → [Address Book PIN].
(Settings/Registration) → [Set Destination] → [Address Book PIN].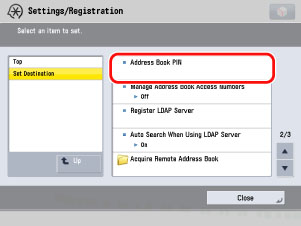
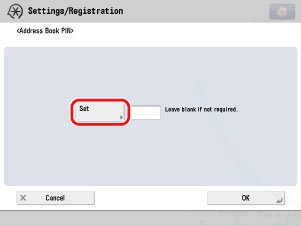
2.
Press [Set].
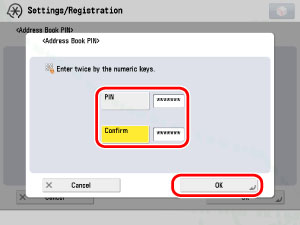
3.
Enter PIN and Confirm → press [OK] → [OK].
Limiting New Destinations
You can operate this procedure using the touch panel display or the Remote UI.
Using Remote UI
1.
Access the Remote UI → click [Settings/Registration] → [Send] → [Limit New Destination].
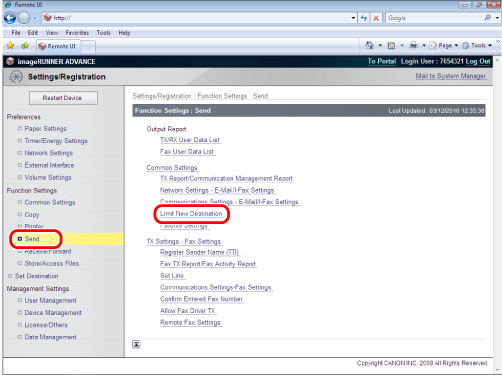
2.
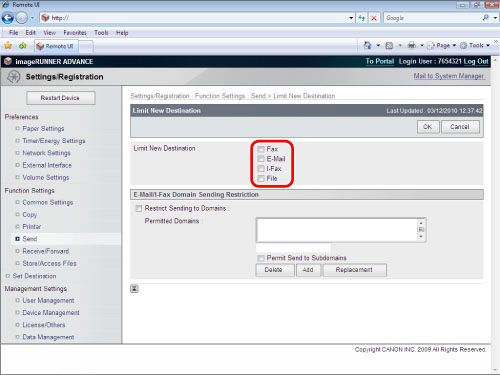
Select the functions for which you want to limit new destinations.
Using the Touch Panel Display
1.
Press (Settings/Registration) → [Function Settings] → [Send] → [Common Settings] → [Limit New Destination].
(Settings/Registration) → [Function Settings] → [Send] → [Common Settings] → [Limit New Destination].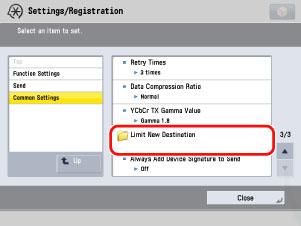
2.
Select the types of destinations to limit → press [On] → [OK].

Managing Address Book Access Numbers
You can operate this procedure using the touch panel display or the Remote UI.
Using Remote UI
1.
Access the Remote UI → click [Settings/Registration] → [Set Destination] → [Manage Address Book Access Numbers].
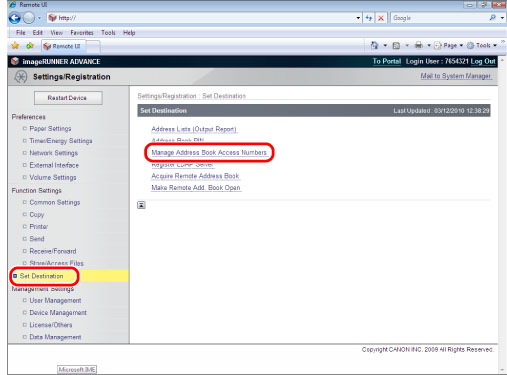
2.
Select [Manage Address Book Access Numbers].

Using the Touch Panel Display
You can specify the settings from the control panel of the machine.
1.
Press (Settings/Registration) → [Set Destination] → [Manage Address Book Access Numbers].
(Settings/Registration) → [Set Destination] → [Manage Address Book Access Numbers].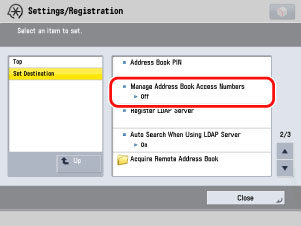
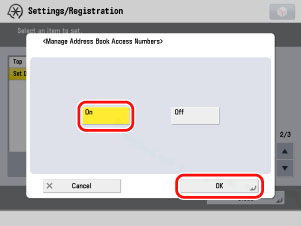
2.
Press [On] → [OK].
Confirming Entered Fax Numbers
You can operate this procedure using the touch panel display or the Remote UI.
Using Remote UI
1.
Access the Remote UI → click [Settings/Registration] → [Send] → [Confirm Entered Fax Number].
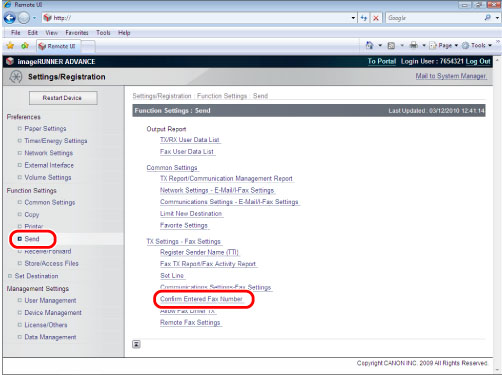
2.
Select [Confirm Entered Fax Number].

Using the Touch Panel Display
You can specify the settings from the control panel of the machine.
1.
Press (Settings/Registration) → [Function Settings] → [Send] → [Fax Settings] → [Confirm Entered Fax Number].
(Settings/Registration) → [Function Settings] → [Send] → [Fax Settings] → [Confirm Entered Fax Number].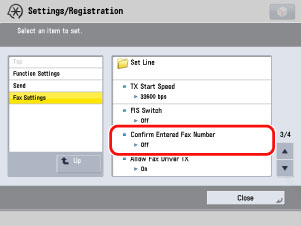
2.
Press [On] → [OK].
A confirmation screen will be displayed each time a fax number is entered and  (Start) is pressed.
(Start) is pressed.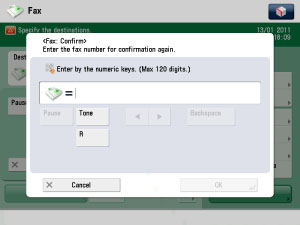
Prohibiting Sending from the Fax Driver
You can operate this procedure using the touch panel display or the Remote UI.
Using Remote UI
1.
Access the Remote UI → click [Settings/Registration] → [Send] → [Allow Fax Driver TX].
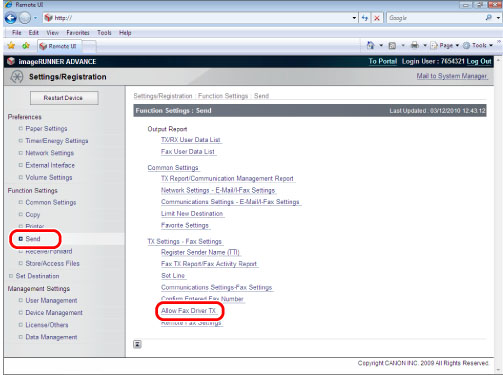
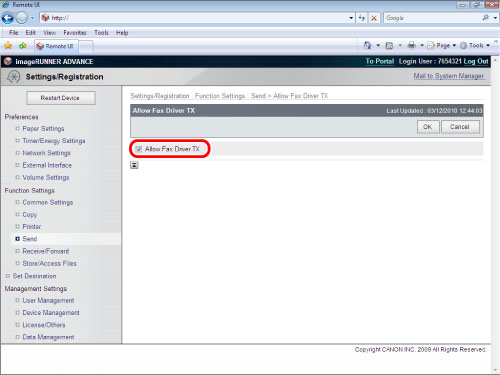
2.
Deselect [Allow Fax Driver TX].
Using the Touch Panel Display
You can specify the settings from the control panel of the machine.
1.
Press (Settings/Registration) → [Function Settings] → [Send] → [Fax Settings] → [Allow Fax Driver TX].
(Settings/Registration) → [Function Settings] → [Send] → [Fax Settings] → [Allow Fax Driver TX].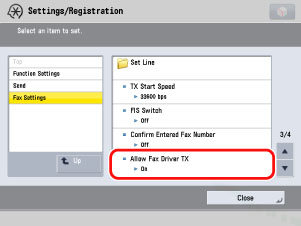
2.
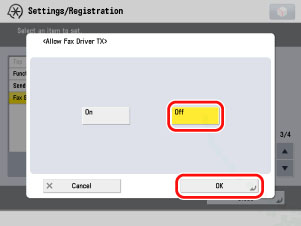
Press [Off] → [OK].
Setting the MAC Address Filter
1.
Press (Settings/Registration) → [Preferences] → [Network] → [Firewall Settings] → [MAC Address Filter].
(Settings/Registration) → [Preferences] → [Network] → [Firewall Settings] → [MAC Address Filter].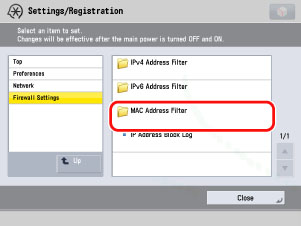
2.
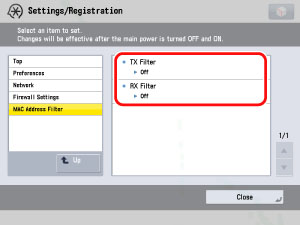
Specify the settings as necessary.
Specifying the TX Destination Domain
You can operate this procedure using the touch panel display or the Remote UI.
Using Remote UI
1.
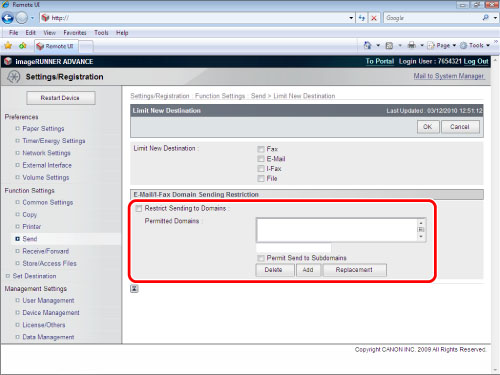
Access the Remote UI → click [Settings/Registration] → [Send] → [Limit New Destination].

2.
Specify the necessary settings for [E-Mail/I-Fax Domain Sending Restriction].
Using the Touch Panel Display
You can specify the settings from the control panel of the machine.
1.
Press (Settings/Registration) → [Function Settings] → [Send] → [E-Mail/I-Fax Settings] → [Restrict TX Destination Domain].
(Settings/Registration) → [Function Settings] → [Send] → [E-Mail/I-Fax Settings] → [Restrict TX Destination Domain].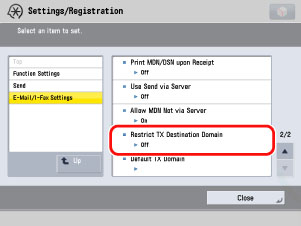
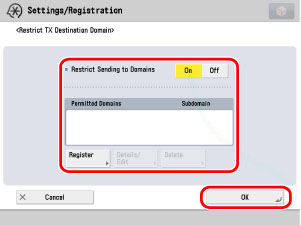
2.
Specify the necessary settings → press [OK].
Encrypting Data
1.
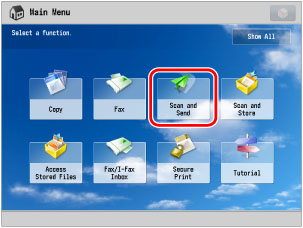
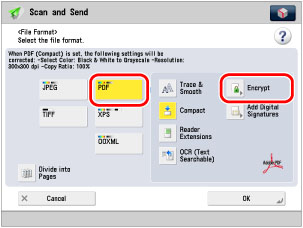
Place your originals on the platen glass or in the feeder → press [Scan and Send] on the Main Menu screen.
|
NOTE
|
|
If the Main Menu screen is not displayed, press
 (Main Menu). (Main Menu). |
2.
Specify the destination → press the File Format button → [PDF] → [Encrypt].
3.
Specify the desired settings → press [OK].
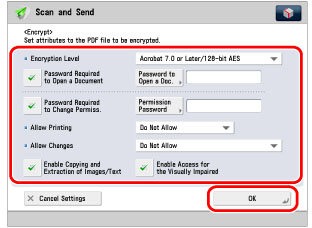
The settings that can be specified differ depending on the encryption level.
The settings available for each encryption level are described in the table below.
Comparison of Settings by Encryption Level
|
Encryption Level
|
Acrobat 3.0 or Later/40-bit RC4
|
Acrobat 6.0 or Later/128-bit RC4
|
Acrobat 7.0 or Later/128-bit AES
|
Acrobat 9.0 or Equivalent/256-bit AES
|
Acrobat 10.0 or Equivalent/256-bit AES
|
|
Version for Viewing
|
Adobe Acrobat 3.0 or later
|
Adobe Acrobat 6.0 or later
|
Adobe Acrobat 7.0 or later
|
Adobe Acrobat 9.0 or later
|
Adobe Acrobat 10.0 or later
|
|
Allow Printing
|
Do Not Allow/Allow
|
Do Not Allow/Allow (Low Res. Only)/Allow
|
|||
|
Allow Changes
|
Do Not Allow
Changes but Add Comments/Extract Pages
Changes but Extract Pages
|
Do Not Allow
Insert, Delete, or Rotate Pages
Signature Field Signing
Commenting and Signature Field Signing
Changes but Extract Pages
|
|||
|
Enable Accessibility, Copy, Extraction of Image/Text
|
If [Password Required to Change Permiss.] is set to 'On'.
|
-
|
|||
|
Enable Copying and Extraction of Images/Text
|
-
|
If [Password Required to Change Permiss.] is set to 'On'.
|
|||
|
Enable Access for the Visually Impaired
|
-
|
If [Password Required to Change Permiss.] is set to 'On'.
|
|||
Reference Information
SSL Communication
You can perform SSL communication which encrypts your data transmissions. Doing so helps prevent data interception, theft, and modification.
|
NOTE
|
|
SSL Encrypted Communication is a send/receive protocol that encrypts data on the Internet. This protocol is widely used to encrypt data on the Internet such as WWW and FTP, which enables confidential information including credit card numbers and trade secrets to be securely transmitted.
|
WebDAV
You can transmit files using WebDAV. WebDAV enables you to share files via an Internet server. If the server supports SSL (HTTPS), all transmissions over the server are encrypted, making file sharing more secure and versatile.