Editing the Forwarding Settings
You can register, edit, or delete the conditions for forwarding received documents.
|
IMPORTANT
|
|
Specifying the Forwarding Settings is available only when the Remote UI is in the System Manager Mode.
|
|
NOTE
|
|
For instructions on how to edit the forwarding settings on the machine’s control panel, see Setting the Send Function.
|
1
Click [Add.Func.] → [Forwarding Settings] in the [Add.Func.] menu.
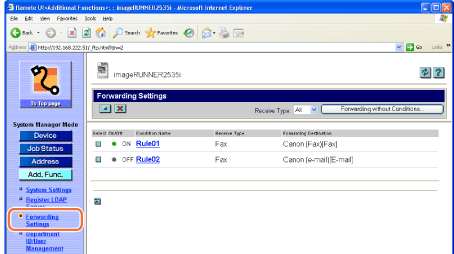
The Forwarding Settings page is displayed.
2
Edit the forwarding settings.
To register a new forwarding condition:
|
1
|
Click [
The Add New Conditions page is displayed.
|
|
2
|
Specify the necessary settings → click [OK].
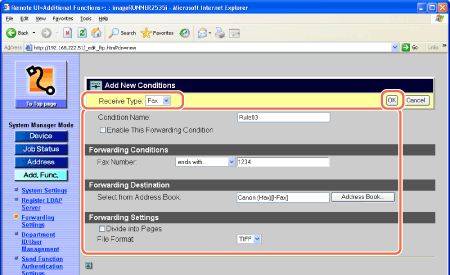 NOTE:
For information on the settings, see Setting the Send Function.
|
To forward all received documents without specific conditions:
|
1
|
Click [Forwarding without Conditions] on the page shown in step 1.
The Add New Conditions page is displayed.
|
|
2
|
Specify the necessary settings → click [OK].
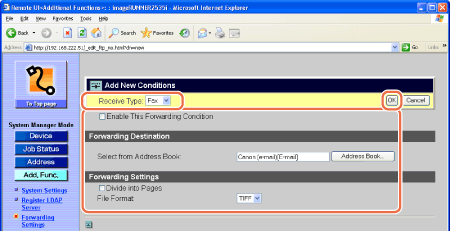 NOTE:
For information on the settings, see Setting the Send Function.
|
To edit the forwarding condition:
|
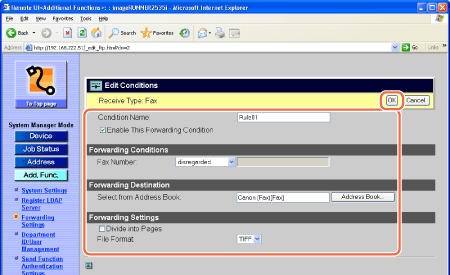
1
|
Click the name of the forwarding condition that you want to edit on the page shown in step 1.
If you select [All] in the [Receive Type] drop-down list box, all the forwarding settings registered in the machine are displayed.
The Edit Conditions page is displayed.
|
|
2
|
Edit the settings as necessary → click [OK].
 |
To delete the forwarding condition:
|
1
|
On the Forwarding Settings page shown in step 1, click [
The selected forwarding condition is deleted.
|