Printing from a Computer
This section describes how to print from a computer.
|
NOTE
|
|
Printing methods may differ depending on the application you are using. For details, see the instruction manuals provided with the application.
|
1
Open the printer driver screen from the application.
2
Click [Preferences] (or [Properties]).
3
Specify the desired settings in the printer driver screen.
If you want to print immediately:
|
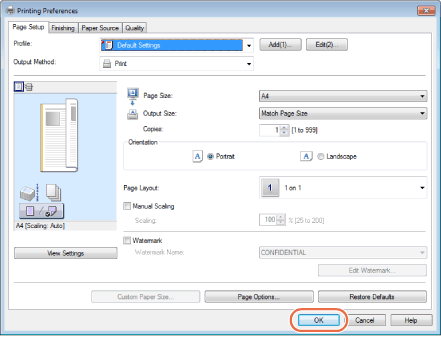
1
|
Click [OK].
 |
|
2
|
Click [Print] (or [OK]).
Printing starts. 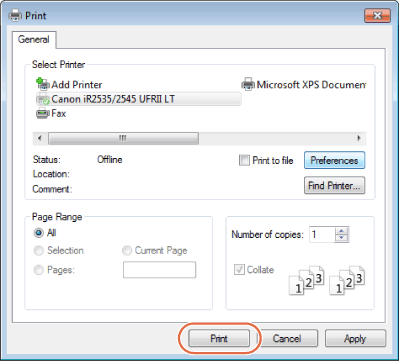 |
If you want to print securely:
IMPORTANT:
We recommend that the printer driver be installed through a network.
To use the Secure Printing function, connect the machine and computer via a network.
If you cannot select [Secured Print] for [Output Method], display the [Device Settings] sheet and select the [Allow Use of Secured Print] check box.
|
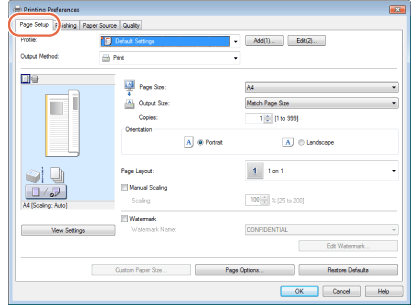
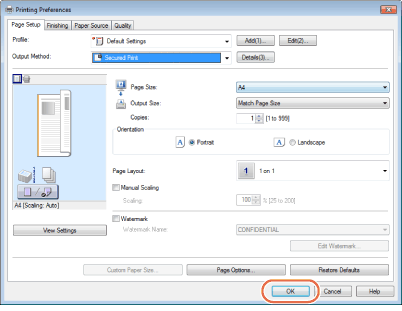
1
|
Click [Page Setup], [Finishing], [Paper Source], or [Quality].
NOTE:
The computer screens below are those displayed when you click [Page Setup].
 |
|
2
|
Select [Secured Print] from [Output Method] and click [Yes] or [No].
 If the screen below appears, specify the desired settings.
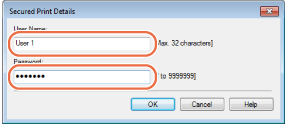 - [User Name]: Enter a name up to 32 characters.
- [Password]: Enter a number up to 7 digits.
|
|
3
|
Click [OK].
 |
|
4
|
Click [Print] (or [OK]).
 |
|
5
|
Specify the desired settings for the secure print job and click [OK].
If [User Name] and [Password] have been set earlier, they will be displayed here.
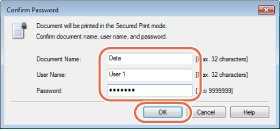 - [Document Name]: Enter a name up to 32 characters.
- [User Name]: Enter a name up to 32 characters.
- [Password]: Enter a number up to 7 digits.
|
|
The secure print job is sent to the machine.
|
|
|
6
|
Press
 (SCAN/OPTIONS). (SCAN/OPTIONS).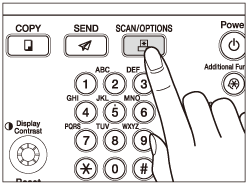 |
|
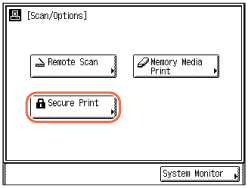
7
|
Press [Secure Print].
 |
|
8
|
Select the document that you want to print, and press [Print].
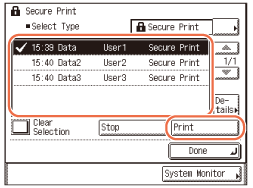 To print all documents, press [Select All] with nothing selected.
|
|
9
|
Enter the password and press [OK].
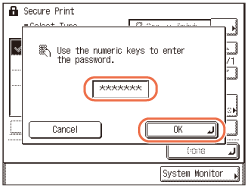 Printing starts.
|
NOTE:
For instructions on how to make settings for Secure Printing Function, see Other System Settings.