Configuring SNTP
 |
|
Simple Network Time Protocol (SNTP) enables you to adjust the system clock by using the time server on the network. The protocol is typically used for synchronizing the machine and a server, such as when the machine needs to access an LDAP server with the security authentication that was enabled. The time is adjusted based on Coordinated Universal Time (UTC), so specify the time zone setting before configuring SNTP (Date/Time Settings). SNTP settings can be specified via the Remote UI.
|
|
NOTE
|
|
The SNTP of the machine supports both NTP (version 3) and SNTP (versions 3 and 4) servers.
|
1
Start the Remote UI and log on in System Manager Mode. Starting the Remote UI
2
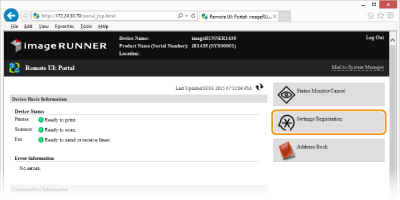
Click [Settings/Registration].
3
Click [Network Settings]  [TCP/IP Settings].

4
Click [Edit...] in [SNTP Settings].

5
Select the [Use SNTP] check box and specify the required settings.

[Use SNTP]
Select the check box to use SNTP for synchronization. If you do not want to use SNTP, clear the check box.
Select the check box to use SNTP for synchronization. If you do not want to use SNTP, clear the check box.
[NTP Server Name:]
Enter the IP address of the NTP or the SNTP server. If DNS is available on the network, you can enter a host name (or FQDN) of up to 255 alphanumeric characters instead (Example: ntp.example.com).
Enter the IP address of the NTP or the SNTP server. If DNS is available on the network, you can enter a host name (or FQDN) of up to 255 alphanumeric characters instead (Example: ntp.example.com).
[Polling Interval:]
Specify the interval between one synchronization and the next. Specify an interval from 1 to 48 hours.
Specify the interval between one synchronization and the next. Specify an interval from 1 to 48 hours.
6
Click [OK].
7
Restart the machine.
Turn OFF the machine, wait for at least 10 seconds, and turn it back ON.
|
NOTE
|
Testing communication with the NTP/SNTP serverYou can test whether the machine is communicating with the registered time server via SNTP. Go to [Settings/Registration]
 |