Adding New Stamped Images
You can add new stamped images to use with Desktop Editor.
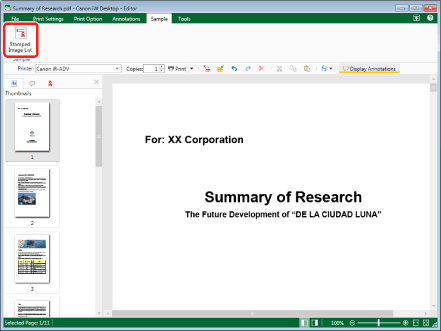
1.
Click  (Stamped Image List) on the ribbon.
(Stamped Image List) on the ribbon.Or, follow one of the steps described below.
Start the Digital Stamps Mode, click  in the digital stamp list on the ribbon, and select [Stamped Image List].
Select the [File] menu > [Settings/Management] > [Stamped Image List].
The [Stamped Image List] dialog box is displayed.
|
NOTE
|
|
If commands are not displayed on the ribbon of Desktop Editor, see the following to display them.
This operation can also be performed with the tool buttons on the toolbar. If tool buttons are not displayed on the toolbar of Desktop Editor, see the following to display them.
For information on how to start the Digital Stamps Mode, see the following.
|
2.
Click [Add].
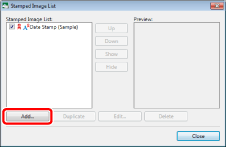
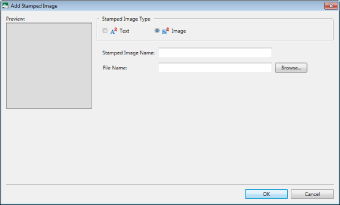
The [Add Stamped Image] dialog box is displayed.
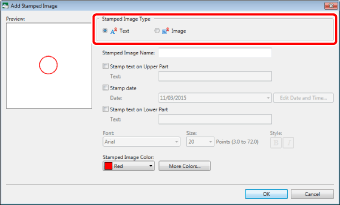
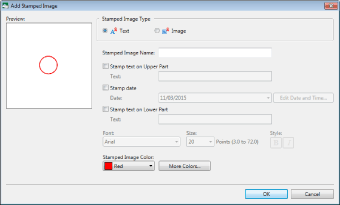
3.
Select the stamped image type to create from [Stamped Image Type].
|
NOTE
|
|
When [Text] is selected, you can register stamped images that use an enclosing circle, the specified text and date.
When [Image] is selected, you can register stamped images that use the specified image file.
|
4.
Configure the detailed stamped image settings.
Text Stamped Image Detailed Settings
|
[Stamped Image Name]
|
Enter the name of the stamped image to add using up to 31 characters. You cannot specify the same name as the name of a stamped image already registered.
|
|
[Stamp text on Upper Part]
|
Select this check box to place text in the top area of the stamped image.
|
|
[Text]
|
Enter the text to display in the top area of the stamped image using up to 50 characters.
|
|
[Stamp date]
|
Select this check box to place the date in the middle area of the stamped image.
|
|
[Date]
|
Select the date display format from the list displayed when you click
|
|
[Edit Date and Time]
|
If you click this, the [Edit Date and Time] dialog box is displayed. You can edit the date display format in the [Edit Date and Time] dialog box. For more information, see the following.
|
|
[Stamp text on Lower Part]
|
Select this check box to place text in the bottom area of the stamped image.
|
|
[Text]
|
Enter the text to display in the bottom area of the stamped image using up to 50 characters.
|
|
[Font]
|
Select the font to use from the list displayed when you click
|
|
[Size]
|
Select the font size to use from the list displayed when you click
|
|
[Style]
|
Configure the style to use. Click this button to switch between ON/OFF. You can also combine the [Bold] and [Italic] styles.
|
|
[Bold]
|
Makes the string bold.
|
|
[Italic]
|
Makes the string italic.
|
|
[Stamped Image Color]
|
Select the stamped image color you want to use from the list displayed when you click
|
|
[More Colors]
|
If you click this, the [Color] dialog box is displayed, and you can set a color that is not listed in [Stamped Image Color].
|
|
NOTE
|
|
For the digital stamp automatically registered during installation and its copies, the "Short Date" or "Long Date" (whichever is selected) set for the "Date Format" of "Date" in [Region and language] in the Control Panel of the computer is always reflected. However, for digital stamps registered by the user, the date data format selected during registration is maintained. In addition, if you change the date data format of a registered digital stamp, the stamp will be updated to the new format.
|
Stamped Image Detailed Settings
|
[Stamped Image Name]
|
Enter the name of the stamped image to add using up to 31 characters. You cannot specify the same name as the name of a stamped image already registered.
|
|
[File Name]
|
Click [Browse] and specify the image file to use in the stamped image. Or, specify the path of the image file to use in the stamped image using up to 259 characters (total number of 2-byte and 1-byte characters).
|
|
NOTE
|
|
The following image file formats can be used for image type stamped images.
BMP
TIFF (For a multi-page TIFF image, the first page is used. TIFF images with transparent parts also can be used.)
JPEG
PNG
GIF
The types of image files that can be inserted may increase, depending on the codecs installed in your computer.
|
5.
Confirm the preview display and click [OK].
The [Stamped Image List] dialog box is displayed again.
The stamped image that you have additionally registered is displayed in [Stamped Image List].
6.
Click [Close].
|
NOTE
|
|
The stamped image icons displayed in [Stamped Image List] in the [Stamped Image List] dialog box indicate the stamped image type.
|