Adding a Table of Contents
You can create a "table of contents" for the entire document by using the chapter name and the first page number of each chapter.
If you create a table of contents, the chapter named "Table of Contents" is inserted into the document.
The layout of the table of contents is as follows:
Title of the table of contents
Symbols for List
Chapter Name
Tab leader
Page Number
Similar to original pages, pages can be configured and edited.
|
IMPORTANT
|
|
After reducing margins etc. with Desktop Editor, if document text appears in the table of contents, updating it will cause all non-table of contents data to be deleted from the table of contents.
|
1.
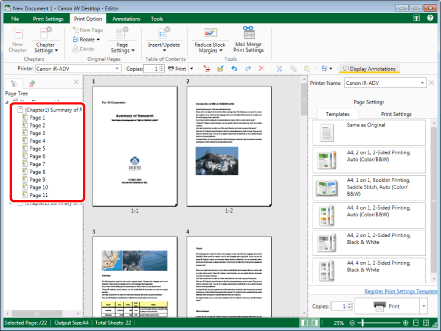
Select the position to insert a table of contents chapter with  (Chapter) or
  (Page) within a chapter on the [Page Tree] tab on the Navigation Window.
Or, on the Work Window, select the page where the table of contents is to be inserted.
|
NOTE
|
|
If the [Page Tree] tab on the Navigation Window is not displayed, see the following.
|
2.
Click  (Insert/Update) on the ribbon.
(Insert/Update) on the ribbon.Or, follow one of the steps described below.
Click  for
for  (Insert/Update) on the ribbon and select [Insert Table of Contents]
for (Insert/Update) on the ribbon and select [Insert Table of Contents]Click  (Insert Table of Contents) on the ribbon
(Insert Table of Contents) on the ribbon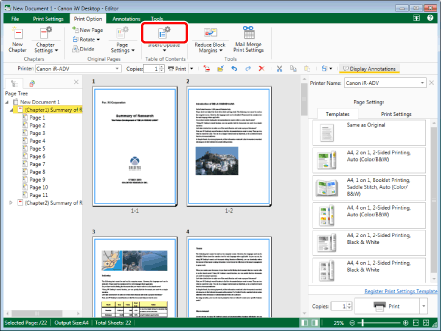
The [Insert Table of Contents] dialog box is displayed.
|
NOTE
|
|
If commands are not displayed on the ribbon of Desktop Editor, see the following to display them.
This operation can also be performed with the tool buttons on the toolbar. If tool buttons are not displayed on the toolbar of Desktop Editor, see the following to display them.
|
3.
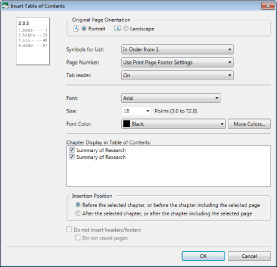
Configure the table of contents.
|
[Original Page Orientation]
|
Sets the page orientation of the table of contents.
|
|
[Portrait]
|
Sets the table of contents page to be oriented vertically.
|
|
[Landscape]
|
Sets the table of contents page to be oriented horizontally.
|
|
[Symbols for List]
|
Sets the beginning symbol of the table of contents.
|
|
[In Order from 1]
|
Sets the table of contents to be numbered, starting at 1.
|
|
[None]
|
If you select [None], symbols are not displayed in the table of contents.
|
|
[Page Number]
|
Enables you to select the header or footer settings for the page number of the print page.
|
|
[Use Print Page Header Settings]
|
Sets the page number to use the header settings set in the print page.
|
|
[Use Print Page Footer Settings]
|
Sets the page number to use the footer settings set in the print page.
|
|
[None]
|
If you select [None], page numbers are not displayed in the table of contents.
|
|
[Tab leader]
|
Sets whether or not to insert a leading line in the space between the table of contents items and page numbers.
If [None] is selected in [Page Number], you cannot select [Tab leader].
|
|
[Font]
|
Select the font you want to use for the table of contents.
|
|
[Size]
|
Select the font size you want to use for the table of contents.
Font sizes that can be configured are between 3.0 and 72.0 points. If it is entered directly, the figures below the second decimal place are omitted.
|
|
[Font Color]
|
Select the font color you want to use for the table of contents. When you want to set a color that is not available in the list, click [More Colors].
|
|
[More Colors]
|
If you click this, the [Color] dialog box is displayed. On the [Color] dialog box, you can set a color that is not listed in [Font Color].
|
|
[Chapter Display in Table of Contents]
|
Select the chapters you want to display in the table of contents. The chapters with check marks are displayed in the table of contents.
|
|
[Insertion Position]
|
Select the position to insert the table of contents.
|
|
[Before the selected chapter, or before the chapter including the selected page]
|
Inserts before the selected chapter, or before the chapter including the selected page.
|
|
[After the selected chapter, or after the chapter including the selected page]
|
Inserts after the selected chapter, or after the chapter including the selected page.
|
|
[Do not insert headers/footers]
|
Select this check box if you do not want to insert headers/footers into the table of contents.
|
|
[Do not count pages]
|
Select this check box to not include the table of contents page number in the page count.
This check box can be selected when the [Do not insert headers/footers] check box is selected.
|
|
NOTE
|
|
To edit a table of contents by selecting [Edit Table of Contents], you cannot set [Insertion Position].
This operation can also be performed with the tool buttons on the toolbar. If tool buttons are not displayed on the toolbar of Desktop Editor, see the following to display them.
|
4.
Click [OK].
Table of contents pages included in the "Table of Contents" chapter are inserted into the document.
|
NOTE
|
|
Similar to normal chapters, the "table of contents" chapter can also be moved, renamed, deleted, and configured.
The "table of contents" chapter cannot be duplicated or moved to a different document.
The table of contents page can be rotated like a normal page.
The table of contents page cannot be duplicated, deleted, or moved out of the "table of contents" chapter.
The following are not included in the page count.
Front cover (when not printing an original on the front cover)
Back cover (when not printing an original on the back cover)
Tab Paper
Sheet insertions that a document is not printed on
The table of contents page contains 10% margins in both the horizontal and vertical directions. (No margin is set on the right side of table of contents titles.)
The title of the table of contents is inserted only in the first page of the "table of contents" chapter.
If you have performed an edit operation (such as renaming chapters and dividing page) on a document after creating the table of contents, it is necessary to update the table of contents. For information on how to update the table of contents, see the following.
To edit the table of contents after creating it, perform one of the following operations.
Click
for (Insert/Update) on the ribbon and select [Edit Table of Contents]Click
 (Edit Table of Contents) on the ribbon (Edit Table of Contents) on the ribbonIf the table of contents is edited, digital stamps/text highlights/underlines/strikethroughs/text notes inserted in the table of contents are deleted.
If commands are not displayed on the ribbon of Desktop Editor, see the following to display them.
This operation can also be performed with the tool buttons on the toolbar. If tool buttons are not displayed on the toolbar of Desktop Editor, see the following to display them.
|