Switching between Expanding and Collapsing the Chapter
When you create a document, a chapter is created for each of the original documents, and the chapter icon and name are displayed on the [Page Tree] tab on the Navigation Window.
You can switch between the expanded/collapsed chapter views on the [Page Tree] tab on the Navigation Window.
Switching between the Expanded/Collapsed Views for a Selected Chapter
You can select whether to display or hide the selected chapter.
1.
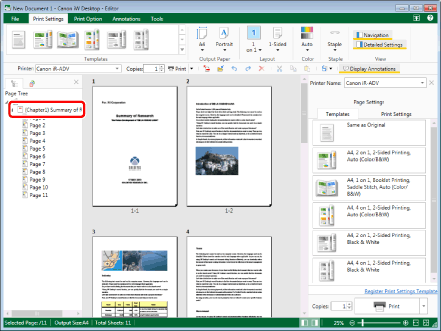
Select  (Chapter) for a chapter to change the view of on the [Page Tree] tab on the Navigation Window.
|
NOTE
|
|
If the [Page Tree] tab on the Navigation Window is not displayed, see the following.
|
2.
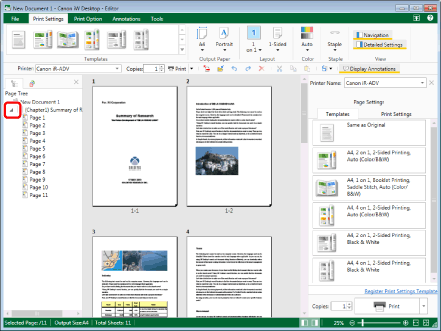
Click  (Expand Chapter) or
  (Collapse Chapter) on the [Page Tree] tab on the Navigation Window.
Or, follow one of the steps described below.
Double-click (Chapter) on the [Page Tree] tab on the Navigation Window
Right-click and select [Expand Chapter] or [Collapse Chapter]
Switching between the Expanded/Collapsed Views for All Chapters
You can select whether to display or hide all chapters.
1.
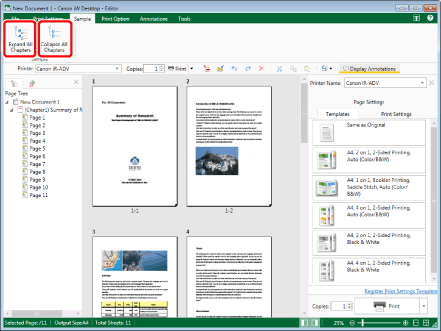
Click  (Expand All Chapters) or
  (Collapse All Chapters) on the ribbon.
(Expand All Chapters) or (Collapse All Chapters) on the ribbon.Or, follow one of the steps described below.
Right-click  (Document) and select [Expand All Chapters] on the [Page Tree] tab on the Navigation Window
Right-click (Document) and select [Collapse All Chapters] on the [Page Tree] tab on the Navigation Window
|
NOTE
|
|
If commands are not displayed on the ribbon of Desktop Editor, see the following to display them.
This operation can also be performed with the tool buttons on the toolbar. If tool buttons are not displayed on the toolbar of Desktop Editor, see the following to display them.
|