Printing the Chapter Name on Index Tabs
You can insert tab paper in the document. When tab paper is set as the inserted sheets, you can print the chapter name on the index tabs of the tab paper.
|
NOTE
|
|
For more information on tab paper, see the following.
When the chapter name is modified, the change is automatically applied to the tab of the tab sheet.
When the chapter name is set to be printed, the chapter name is also reflected in the tab area when exporting to a PDF document.
Even if 2-sided printing is specified, the chapter name is only printed on one side of the index tab (the same is true at the time of export to a PDF document).
|
1.
Select the [Tab paper] check box in [Sheet for Insertion] on the [Print Settings] tab on the Details Window.
Or, click  (For Insertion) on the ribbon and select [Tab paper].
(For Insertion) on the ribbon and select [Tab paper].
|
NOTE
|
|
If the Details Window is not displayed, see the following.
If commands are not displayed on the ribbon of Desktop Editor, see the following to display them.
This operation can also be performed with the tool buttons on the toolbar. If tool buttons are not displayed on the toolbar of Desktop Editor, see the following to display them.
|
2.
Click [Detailed Settings for Insert Sheets] in [Sheet for Insertion] on the [Print Settings] tab on the Details Window.
Or, click (For Insertion) on the ribbon and select [Detailed Settings for Insert Sheets].
(For Insertion) on the ribbon and select [Detailed Settings for Insert Sheets].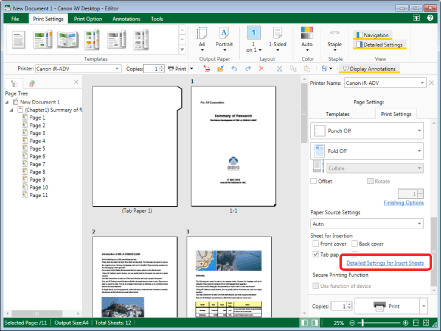
The [Sheets for Insertion Settings] dialog box is displayed.
|
NOTE
|
|
If commands are not displayed on the ribbon of Desktop Editor, see the following to display them.
This operation can also be performed with the tool buttons on the toolbar. If tool buttons are not displayed on the toolbar of Desktop Editor, see the following to display them.
|
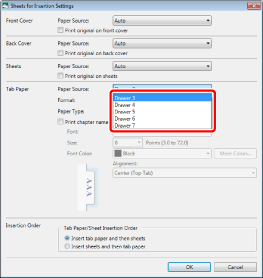
3.
Select the paper source to feed tab paper from the [Paper Source] pull-down list of [Tab Paper].
|
NOTE
|
|
Select a paper source other than the inserter. When paper is fed from the inserter, chapter names cannot be printed on the index tabs.
The options available in [Paper Source] may vary depending on the type of paper sources installed on the printer selected in [Printer].
|
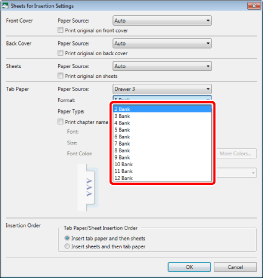
4.
Select the number of the tab area on the tab paper from the [Format] pull-down list.
5.
Select the type of sheet to use for tab paper from the [Paper Type] pull-down list.
|
NOTE
|
|
The paper type options that are available vary depending on the printer selected in [Printer].
|
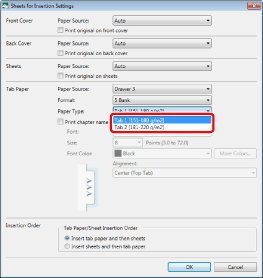
6.
Select the [Print chapter name on tab] check box.
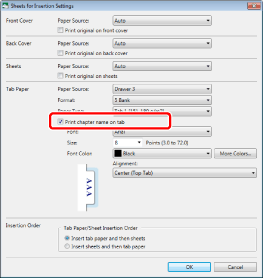
7.
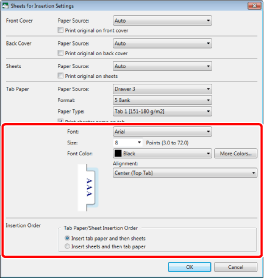
Configure the format.
|
[Font]
|
Select the font to use from the list displayed when you click
|
|
[Size]
|
Select the font size to use from the list displayed when you click
|
|
[Font Color]
|
Select the font color you want to use from the list displayed when you click
|
|
[More Colors]
|
If you click this, the [Color] dialog box is displayed. On the [Color] dialog box, you can set a color that is not listed in [Font Color].
|
|
[Alignment]
|
Select how the text is aligned.
|
|
[Insertion Order]
|
Set the order in which the pages will be inserted.
|
|
[Tab Paper/Sheet Insertion Order]
|
Select [Insert tab paper and then sheets] or [Insert sheets and then tab paper].
|
8.
Click [OK].