Sending a Fax from an Application
This section explains the basic procedure for sending a fax from an application.
1.
Select [Print] from the application's [File] menu.
2.
In the [Print] dialog, select the device to use from the [Printer] pop-up menu.
3.
Configure the fax sending options.
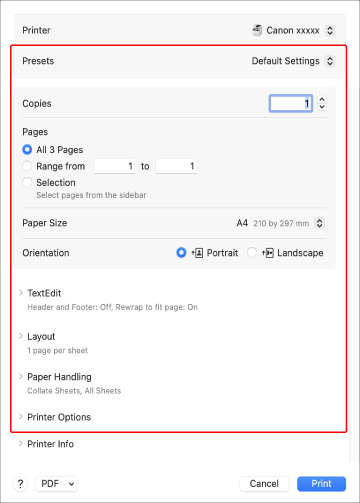
To use settings saved as a preset
Select the name of the preset from the [Presets] pop-up menu.
To configure the fax function of the device
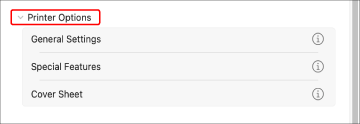
Click [Printer Options] → configure the required items.
4.
Specify a destination.
To enter a new address
(1) Click [General Settings].
(2) Click [Add Destination].
(3) In the displayed dialog, enter the fax number in [Fax Number] → click [Add] or [Add Destination].
Only [Fax Number] is required. Set the other items according to your needs.
(4) Click [OK].
To select an address from the address book
(1) Click [General Settings].
(2) Click [Address Book].
(3) In the displayed dialog, select the destination → click [Add] or [Add Groups].
When adding a group as a destination, the numbers set as the highest priorities in [Edit] > [Edit Distribution List] in macOS "Contacts" are displayed.
(4) Click [OK].
 NOTE
NOTEThe maximum number of destinations that a fax can be sent to differs according to the setting in [Cover Sheet Attachment] of the [Cover Sheet] pane, as indicated below. When the following number of destinations is exceeded, the job is divided into multiple jobs for sending. Therefore, the job may be displayed as multiple jobs in the fax sending history, etc.
When [Cover Sheet Attachment] is set to [None]: 256 destinations
When [Cover Sheet Attachment] is set to [Different Sheet to Each Destination]: 32 destinations
When [Cover Sheet Attachment] is set to [Same Sheet to All Destinations]: 256 destinations
5.
In the [Print] dialog, click [Print].